Screen settings
Name, playlist, display, working hours, alerts, device and advanced actions for each screen.
Open Screens and choose a screen to see its page: the live picture and the quick actions on the left, Screen settings on the right, in tabs. Changes in a tab are kept with Save changes.
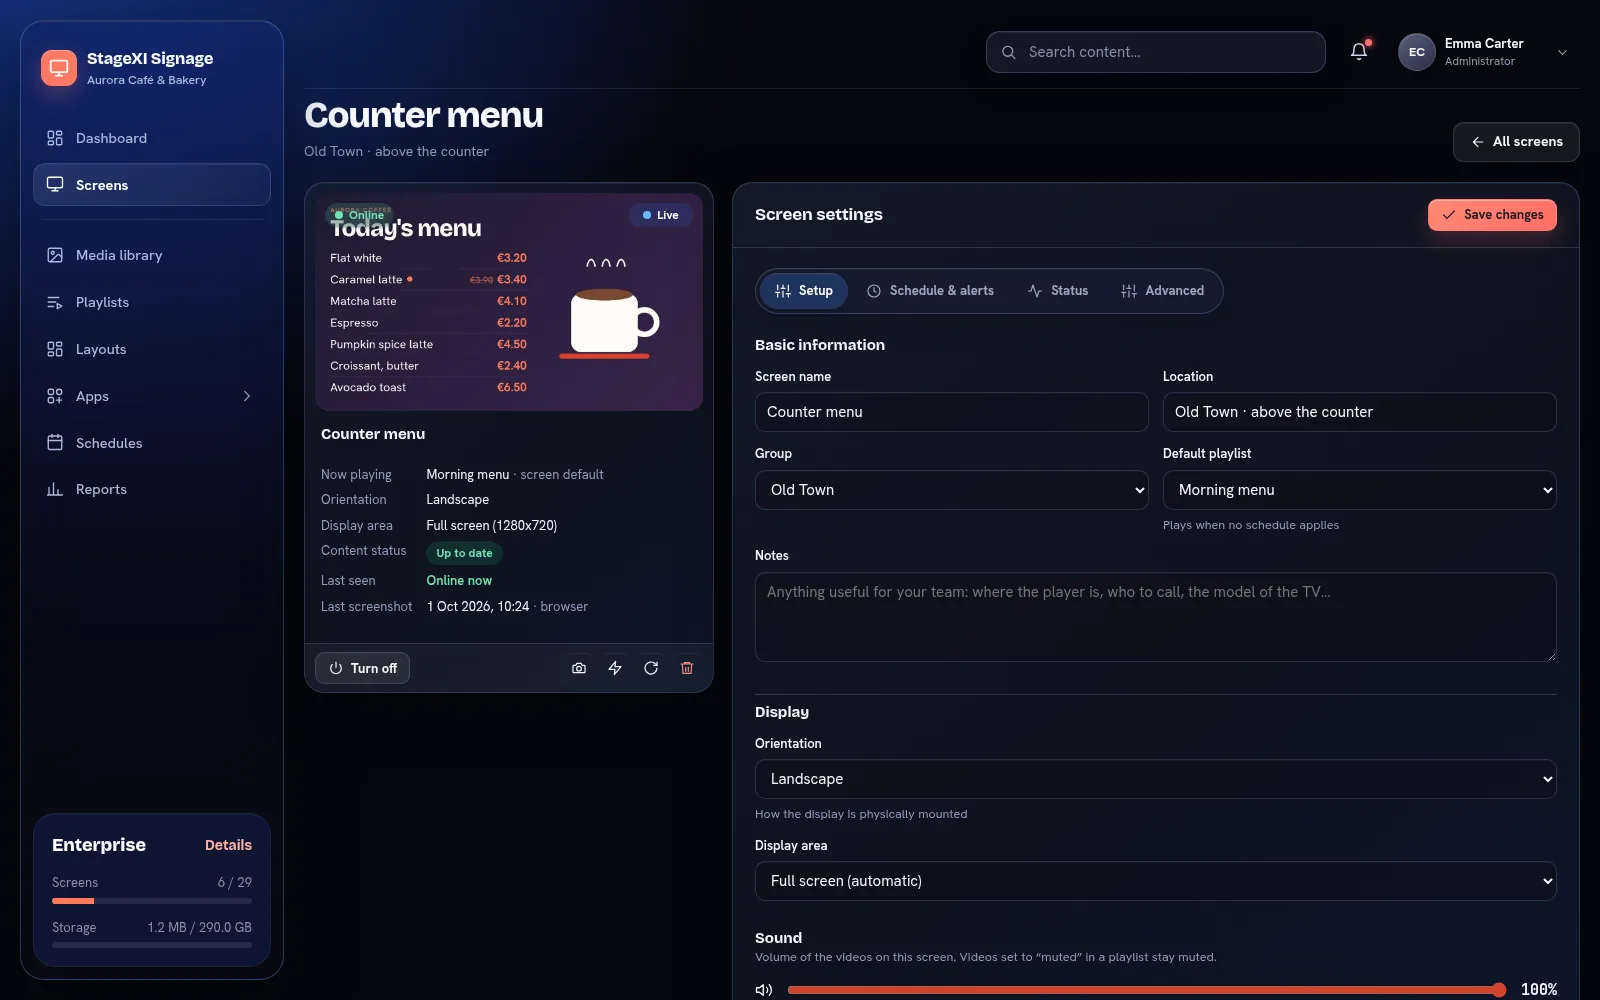
The screen card
Under the live picture: what plays now and why (the screen's default, a schedule, a video wall), the orientation, the display area, the content status and when the screen was last seen. The buttons turn the screen off or on, ask for a screenshot, show the screen's name on it (Identify), reload it or remove it.
Setup
- Basic information: name, location, group, default playlist (what plays when no schedule applies) and notes for your team.
- Display: orientation (landscape or portrait, including upside down) and the display area: full screen, or a custom area in pixels for LED panels fed by one player.
- Sound: the volume of the videos on this screen.
Schedule & alerts
- Working hours: the hours when the screen shows content; outside them it is black. See Working hours.
- Offline alerts: turn the e-mails on or off for this screen. Turn them off for screens that are switched off on purpose.
Status
The Screen ID (give it to support when you need help), the connection, the content status (up to date, downloading, out of date), the player and its version, the resolution, the IP address and when the screen was paired.
Device
Business and up
With the Windows and Android TV apps: restart the app or the device, the remote of an Android TV box, the remote desktop of a Windows player. Only people who may control devices see this tab. See Monitoring.
Advanced
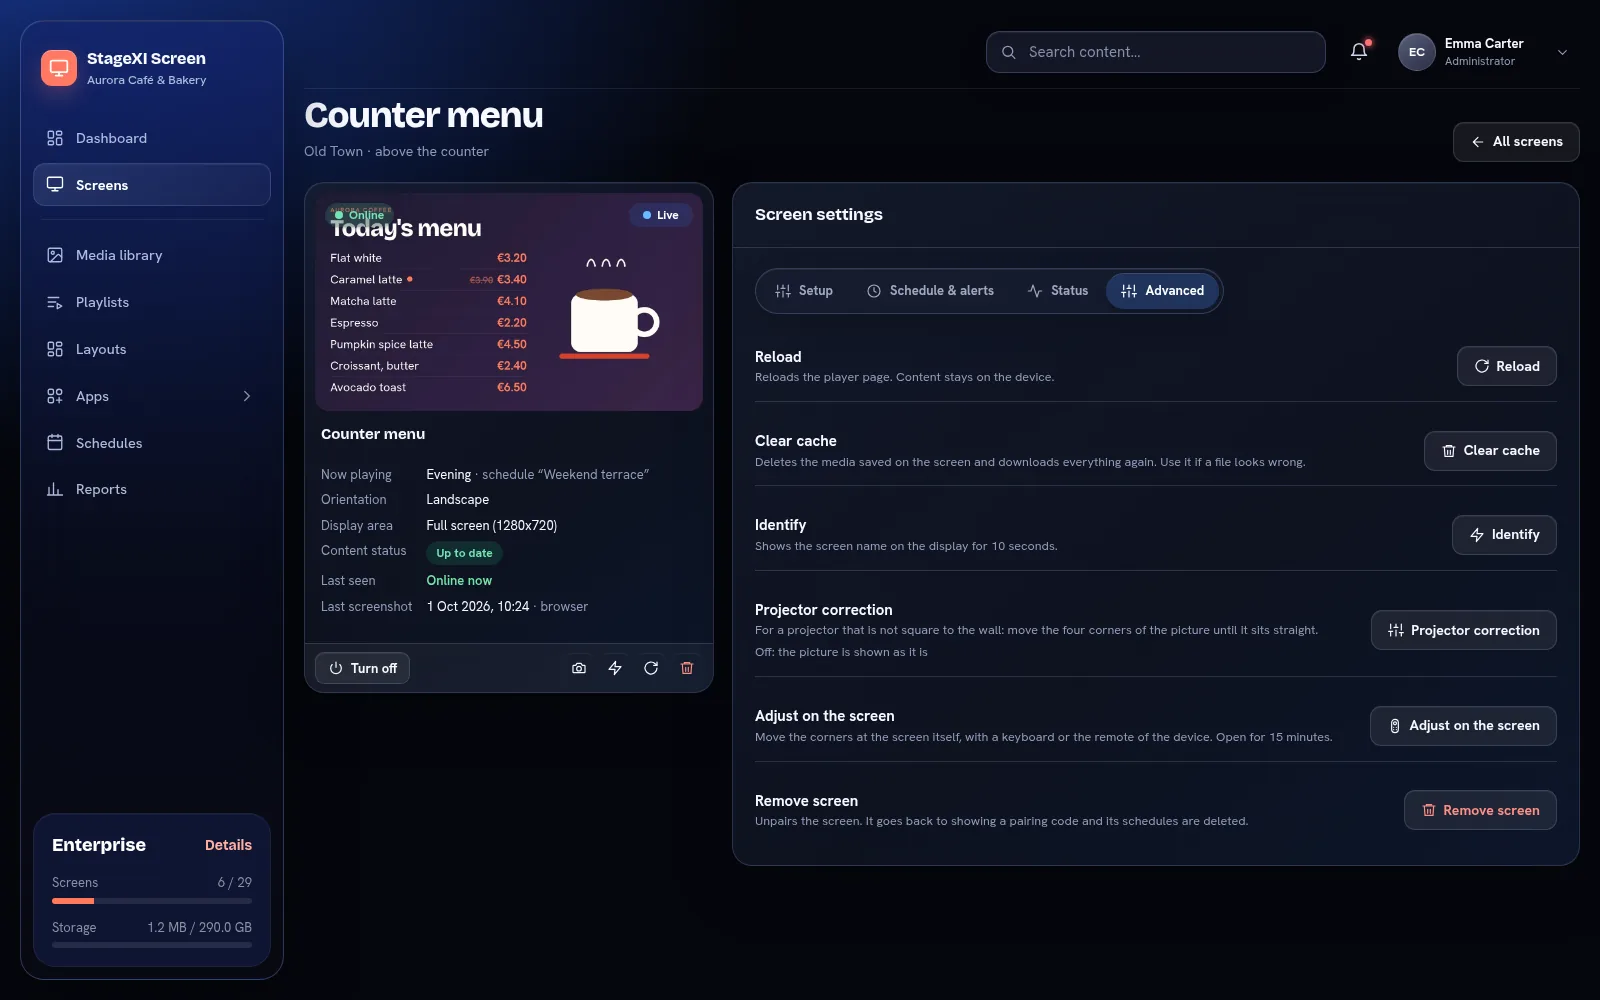
- Reload: loads the player page again. Content stays on the device.
- Clear cache: deletes the media saved on the screen and downloads everything again. Use it if a file looks wrong.
- Identify: shows the screen's name on the display for 10 seconds.
- Projector correction and Adjust on the screen: see below.
- Remove screen: unpairs the screen. It goes back to showing a pairing code and its schedules are deleted.
Projector correction
Enterprise and the trial
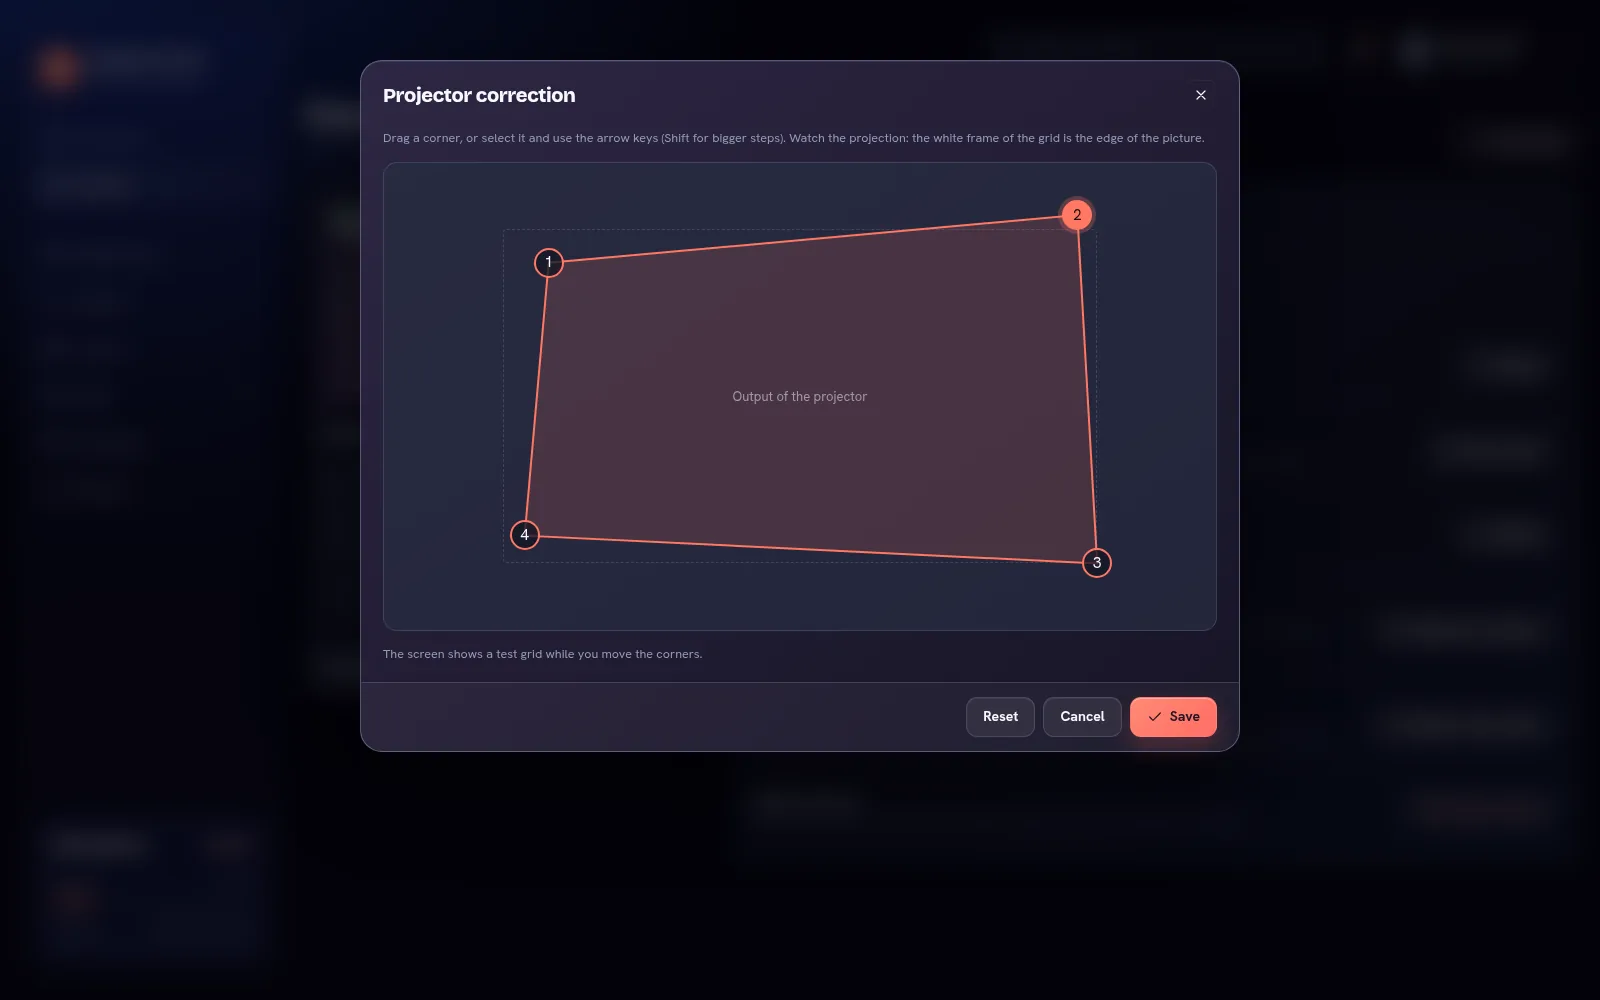
A projector that is not square to the wall shows a slanted picture. In the screen's Advanced tab choose Projector correction and drag the four corners until the picture sits straight. Only people who may control devices see it. While you move them the projection shows a test grid; the arrow keys move the selected corner in small steps (hold Shift for bigger ones). Save keeps the correction on the screen, also offline and after a restart; Reset then Save turns it off.
Standing at the projector? Choose Adjust on the screen: for 15 minutes the screen accepts a keyboard or the device's remote. The arrows move the selected corner (hold them for bigger steps), OK goes to the next corner and, after the fourth, asks to save; Back cancels.
The mobile app has the same editor: open the screen and choose Projector correction. Drag a corner with your finger or use the arrows for small steps; the projection follows as you move.
Everything on the screen follows the correction. Camera pictures shown by the Windows and Android TV apps are drawn by the device itself and stay uncorrected.
Still need help?
Write to us and we will answer within one working day.